|
ZModeler Tutorial v2.0 |
|
ZModeler Tutorial v2.0 |
Getting Started
The first thing we need to do is load the images into ZModeler. I have selected a Fiat Scudo van for the example in this tutorial.
I found the blueprints on www.suurland.com, and there are also some available at www.onnovanbraam.com.
My Texture Sheet
I have to split that image up into four images, and you can do that with Adobe Photoshop or Jasc Paint Shop Pro. Remember, the textures must be in a 256x256 or 512x512 canvas. Any other multiple of 8 will do as well.
After the images are split up, load them into ZModeler. Refer to version 1 of this tutorial if you do not know how to do this.
After I have them loaded, I start on the model. I like to start from the side view, model the front end, and move to the hood of the vehicle. Referring to the side AND front views is essential in this process.
Here is what my side and front views look like at the very beginning:

Make sure the view corresponds with the blueprint. My blueprint featured
the left side of the van, so I must have ZModeler's view set to Left. The
alignment of the blueprints is also very important. Note how they are
almost lined up perfectly. This will ensure precision extruding.
You can align your textures using the following
button:
![]()
Use the left mouse button to move the image, and use the right click button to zoom. Because ZModeler has its limits on the movement of the images, you may need to resize them in Photoshop or Paint Shop Pro first. This feature is only available in ZModeler 1.05 and later.
Because I had no idea on how the van looked like, I looked up some pictures:
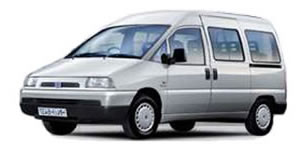
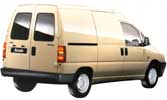
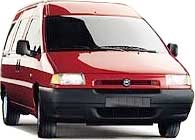
With these angle shots, I can determine how much I need to extrude, which also
translates to which parts I need to add more polygons to. There is a gap
line parallel to the wheels, which I will make. But first, lets make the
front end.
Because you need somewhere to start off, go to Create>Surfaces>Flat. Drag it along a place where you would like to start.
As you can see, that doesn't line up to the body, so you must switch to the
vertices mode and move it.
Now it looks like this:
When you're ready to start on the rest of the vehicle, go to
Create>Faces>Single to make more faces. Create>Faces>Strip also works.
Make faces along the shape of the car. Do NOT overlap polygons.
Click on two red dots and click on the place where you want the third dot to be.
For more info, check version 1.
Because there is extruding on this van, I intentionally modeled around it.
Of course, I could have used textures to show this, but I am modeling it out to
show how to extrude.

I modeled this much, but as you can see, it's still just a flat surface.
This is when you need to use the front view.
Drag the vertice to the correct position on the Front view. In the Front
view, use the X axis. In the side view, use the Z axis. You have
just extruded your first polygon! Be prepared for more extrusion in
the next section!
Press the Back button on your browser to go back to the index.